Pottery Blog
If you're looking for something to do near Whitefish Montana or Glacier National Park, you can book a lesson with Steve or enjoy reading some of the following ceramic articles.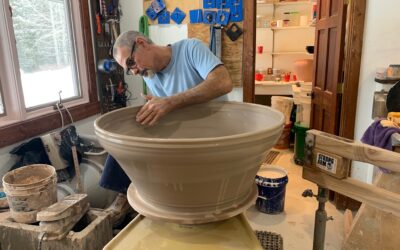
101 + ways that Pottery Lessons Improve your Life
Pottery lessons can improve many areas of your life. Here are 101 ways that searching for, “pottery lessons near me,” can be a huge benefit to you.
Chronic Pain and the Pottery Studio
Understanding Chronic Pain in the Pottery Studio Chronic pain while working in the pottery studio can be characterized by persistent discomfort or pain that lasts for an extended period of typically three months or more, beyond the normal healing time of an injury or...
Choose artistry rather than drugs or alcohol
In today's fast-paced world, many individuals seek refuge from life's pressures through various means, including drugs or alcohol. However, there is a healthier and more fulfilling alternative: pottery. Engaging in pottery offers a therapeutic escape that not only...
Make Money Making Stuff
Monetizing Your Pottery Passion For pottery enthusiasts, the allure of turning their passion into a profitable venture is an enticing prospect. With the rise of entrepreneurship and the growing demand for handmade, artisanal products, the business potential within...
Pottery and Garden Art
The Charm of Ceramic Garden Art Transforming outdoor spaces into enchanting havens of beauty and tranquility is a timeless pursuit for many gardening enthusiasts. While flowers and foliage play starring roles in garden design, incorporating ceramic garden art adds a...
Cultivating Humility in the Pottery Studio
The Lessons Learned in a Potter's Studio In a world that often celebrates individual achievement and self-promotion, the humble art of pottery offers a refreshing counterbalance—a reminder of the importance of humility and reverence for the creative process. Learning...
Keeping Your Mind Sharp
The Cognitive Benefits of Learning Pottery In a world where cognitive decline is a growing concern, finding ways to keep our brains active and healthy is more important than ever. While activities like puzzles and reading are often touted as brain-boosting exercises,...
Pottery Classes and Self Esteem.
Unveiling the Power of Getting Good At Something: Self-esteem is a crucial component of mental and emotional well-being, shaping how we perceive and interact with the world around us. While there are various avenues for boosting self-esteem, one often overlooked path...
Clay, Pottery, and God
Finding Divine Connection Through Pottery Classes: Pottery has long been associated with spiritual practices, dating back to ancient civilizations where clay was revered as a sacred medium for creation. In modern times, pottery classes offer more than just a creative...
Release Your Inner-Alter-Ego in pottery class
The Transformative Power of Pottery Becoming a potter isn't just about shaping clay—it's about discovering a new identity, exploring untapped creativity, and embracing the freedom to express oneself in unexpected ways. For many individuals, pottery offers a unique...
Pottery classes as a way to curb overeating
Clay In Your Hands Instead of Food In Your Mouth Pottery classes offer more than just a creative outlet—they can also serve as a surprising ally in the battle against overeating. While it may seem unconventional, the unique environment of the pottery studio can help...